RSS/Atom feed Twitter
Site is read-only, email is disabled

Tutorial: Create sparkle on any object!
Written by · Created on Apr 06, 2009, last updated almost 12 years ago CC BY-NC License
Create sparkle on any object!

Motivation

You all know these exaggerated advertisments where objects glitter very clearly. I.e. think about a dishwasher commercial where the glasses sparkle in an extreme way after the washing. It is pretty easy in GIMP to accomplish this effect - you only have to know how you do it ;)

Tutorial details

  1. 1

    Open up any image that you want sparkle on. That could be text, a photo or something else.

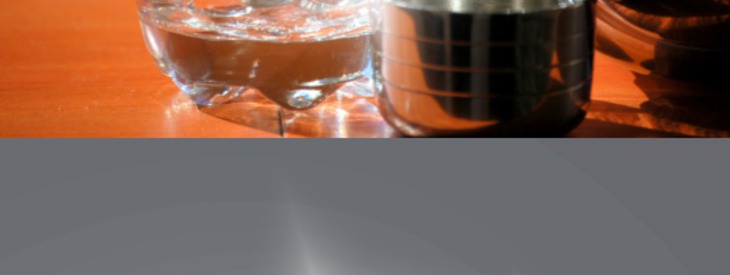
    I’m using a cocktail glass photo in this tutorial.

  2. 2

    We’ll need to create a special brush ourselves.

    Open the brush dialog: Window / Dockable Dialogs / Brushes or simply press SHIFT+CTRL+B.

  3. 3

    Click “New Brush” at the bottom of the dialog – name it “Glitter”.

    As FORM use the third option.

    The radius depends on the size of object you want the glitter to be on.

    I use ~75 – thats a good value for most objects.
    Use the values of the screenshot below:

    SPACING is not important for us in this case because we only apply a single sparkle at a time.

  4. 4

    Now choose the paintbrush tool. The “Glitter” brush should be active automatically. If not please choose it from the dropdown where you can assign the brush.

    - Create a new transparent layer. Press at different places in the picture preferably at bright/highlighted areas.

    Tip: While applying the glitter also change the size of the brush using the brush scale option in the tool prerferences. You’ll get a more appealing look if the sparkle is not always the same size.

    You can apply that sparkle to almost everything. Please don’t use too much of it or you’ll lose the effect!

  5. 5

    Tip #2: If you want to refine the sparkle effect:

    - Duplicate the layer with the sparkle
    - Set layers mode of the duplicate to “soft edges”
    - Move the duplicate below the original sparkle layer. After that the sparkle is shining a bit more.

Comments

Post your own comments, questions or hints here. The author and other users will see your posting and can reply to it.

Of course, you can also ask in the chat.

Subscription management

Please log in to manage your subscriptions.

User rating

This topic (Create sparkle on any object!) has been rated 5.0/5.0.

New comments are disabled because of spam.

robin
almost 5 years ago

How do you save this tool ?
When I quit gimp the tool is gone.

G2Vicoigne member for over 9 years G2Vicoigne 4 comments rated this topic with 5/5
almost 7 years ago

CLAIR ET NET

MrsKirstyHoll
over 9 years ago

Thank you for posting this. So clear and so easy to follow.

Exactly what I needed at work today :)

cinaparadox
over 11 years ago

Really helpful! Works great when you tint the sparkle a bit.

devvv member for over 18 years devvv 1475 comments
almost 12 years ago

thanks!

Brian
almost 12 years ago

we’ll need a special brush that has to be created by ourselfes.

We'll need to create a special brush ourselves.

lousiewhei member for over 12 years lousiewhei 14 comments rated this topic with 5/5
over 12 years ago

Great tutorials. Learned techniques I never thought of.

Don't sue me. I found the original pic on the web, and use it for this tutorial. I used to use the Gradient Flare filter in GIMP 2.6. Always have problem adjusting the transparency level, and hard to get rid of the ring. Any suggestions? And how to use the Lens Flare filter? It does not work for me, must be doing something wrong.

lousiewhei member for over 12 years lousiewhei 14 comments
over 12 years ago

On Step 5, 'soft edges', I cannot find it on the list of layer mode. What am I missing? Thanks.

Todo Gimp
over 13 years ago

Great job, I've made a spanish version of your tutorial, you cand find it here:
http://www.todogimp.com/?q=general/tutorial-anyadir-brillo

Thanks

Rahul Prasad
almost 14 years ago

Is there any way that sparkle rotates automatically after each click?

ChadBJX member for over 14 years ChadBJX 1 comment rated this topic with 5/5
over 14 years ago

Very helpful for a new Gimp user.
Thanks

Mark rated this topic with 5/5
over 14 years ago

Thanks for putting out a great little tutorial. It's a great help to those like me who would otherwise spend hours trying to get the same results. Your post is a real time save.

Nice one

Muhammad Anas rated this topic with 5/5
over 14 years ago

Hi devvv,
Thankyou very much for such a nice tutorial ... I found it very helpful for me.

@ KiaC:
friend, you probably need to change the foreground color of your gimp to get white sparkels!!!!

Rada
over 15 years ago

This works very well, thank you. I find a small 5-point star can go well on teeth. I'm new to GIMP, so I'd like to know the purpose of the new transparent layer because I made mine without it. I couldn't find a 'soft edges' layer mode, so I used 'soft light' instead.

KiaC
over 15 years ago

ok, I am a complete idiot when it comes to this program but I'm trying to teach myself. When I tried this tutorial, I was able to make the sparkle marks but only in black. How do I change it to the clear/white sparkle color? Thanks.

127markaz
over 15 years ago

For those criticizing the simplicity of this and finding no value to the tutorial, fine. We cannot all be experts who know everything and cannot learn any more. This is very valuable and from those of us who appreciate a tip on making our crude graphics better, thank you!!!!!!

gimp_newbie
over 15 years ago

g8 tut. Simple step & easy to understand. Thx.

mamboze
over 15 years ago

Very good tut. It showed me an effect I had not thought of. Thanks

devvv member for over 18 years devvv 1475 comments
over 15 years ago

learner: i guess this is very hard task and depends heavily on the photo itself. sometimes you can use tha clone-tool, sometimes you can manipulate using fine color corrections using the levels/curves.

learner
over 15 years ago

Hi Devvv. I'm a newbie in graphical area. How do I reduce glaring or sparkling objects that's already in a photo ?

mbrown member for over 15 years mbrown 1 comment
over 15 years ago

Nice tutorial. As a new user to GIMP, I'm really appreciative. Please continue to provide tutorials.

Hinachan
over 15 years ago

Thanks for this tutorial! I have a separate program that can apply sparkle effects, but it's nice to see how it can be done within the GIMP. Sure beats having to save a picture, and open it in another program to add this effect!

alejandro
almost 16 years ago

thanks, cool tutorial!!!

Carusoswi member for almost 16 years Carusoswi 3 comments
almost 16 years ago

Snowy, as one who users Gimp and CS4 on a lot of photos, my interest in this sort of manipulation has just been piqued by this tut that I have ignored for weeks, now. Just ran through it and was amazed that Gimp could do such a thing in so few steps. It's part of the program I have never explored previously. Is anyone, anywhere helped by your negative commment served up because you already knew how to do this? I just discovered a whole new dimension of GIMP (probably photo manipulation in general) of which I was not aware. Pretty exciting to me. Devvv, thanks for posting.

caruso

devvv member for over 18 years devvv 1475 comments
almost 16 years ago

thanks for the nice words content_writer ;) more tutorials are coming for sure - it's a bit hard since I write them in german first and have to translate them afterwards (lot of work =))

content_writer member for almost 16 years content_writer 5 comments
almost 16 years ago

Thanks devv,

I'm going to try this right now. Please keep making new tutorials. You're consistantly one of the best GIMP tutors in both content and style

devvv member for over 18 years devvv 1475 comments
almost 16 years ago

Thanks gimpster!

Maybe you could try to use the curves on the sparkle. set the channel in the curves to Alpha and move the points togethter into the center. that would remove the blurry thing on the glare effect and make it sharper.

Hope that helps ;)

@ snowy: it is a skill-1-tutorial - thats usually a tutorial that is very easy to accomplish by anyone. I'm very sure this tutorial is not too boring for most users.

Gimpster member for about 16 years Gimpster 5 comments
almost 16 years ago

A useful technique, nice to be able to generate flare effects on highlights. Tutorial is well written and easy to follow. I am going to try other shapes; I want more of a soft-focus-filter effect in the highlights, without blurring the image. Curious how one user finds it old/boring/mediocre and another user finds it a creative inspiration! Thanks Bernhard!

Snowy
almost 16 years ago

Noting too new or intresting. Mediocre tutorial.

tulcod
almost 16 years ago

But be careful not to overuse sparkles!

devvv member for over 18 years devvv 1475 comments
almost 16 years ago

thanks pat! updated the tutorial ;)

Pat
almost 16 years ago

neat !

Step 4 you should indicate to use Paintbrush tool, caus won't work with pencil tool (

Kitusha member for almost 16 years Kitusha 1 comment
almost 16 years ago

koolness xD