


Trying to remove fading from old b&w photo
This discussion is connected to the gimp-user-list.gnome.org mailing list which is provided by the GIMP developers and not related to gimpusers.com.
This is a read-only list on gimpusers.com so this discussion thread is read-only, too.
| Trying to remove fading from old b&w photo | Denzo | 18 Nov 15:58 |
| Trying to remove fading from old b&w photo | Ofnuts | 18 Nov 23:11 |
| Trying to remove fading from old b&w photo | Denzo | 21 Nov 15:01 |
| Trying to remove fading from old b&w photo | Joel Rees | 21 Nov 22:48 |
| Trying to remove fading from old b&w photo | Denzo | 22 Nov 16:52 |
| Trying to remove fading from old b&w photo | Joel Rees | 23 Nov 00:43 |
| Trying to remove fading from old b&w photo | Denzo | 24 Nov 21:06 |
| Trying to remove fading from old b&w photo | Liam R. E. Quin | 23 Nov 06:32 |
| Trying to remove fading from old b&w photo | Denzo | 24 Nov 21:18 |

- postings
- 5
Trying to remove fading from old b&w photo
Can anyone point me to a good tutorial? I want to remove fading (or maybe it's glare from an old flash?) in one area of an old black and white family photo. I have checked YouTube for tutorials. Many thanks.
Trying to remove fading from old b&w photo
On 18/11/16 16:58, Denzo wrote:
Can anyone point me to a good tutorial? I want to remove fading (or maybe it's glare from an old flash?) in one area of an old black and white family photo. I have checked YouTube for tutorials. Many thanks.
It's likely to be due to silver salts migration that make the surface of the photo reflective in the dark areas. Very hard to remove with an image editor. The best cure to it to take a picture of the original photo with a side lighting that isn't reflected back in the camera lens.
- postings
- 5
Trying to remove fading from old b&w photo
It's likely to be due to silver salts migration that make the surface of
the photo reflective in the dark areas. Very hard to remove with an image editor. The best cure to it to take a picture of the original photo with a side lighting that isn't reflected back in the camera lens
Many thanks for that, I have actually managed to improve it quite a bit with image editing, even though it took a while. I'll definitely store your suggestion away for future reference.
Trying to remove fading from old b&w photo
Sending questions to notifications@ is not necessary. :/
About your question, I'll offer my opinion.
On Tue, Nov 22, 2016 at 12:01 AM, Denzo wrote:
On Sat, Nov 19, 2016 at 8:11 AM, Ofnuts wrote: [...]
It's likely to be due to silver salts migration that make the surface of
the photo reflective in the dark areas. Very hard to remove with an image editor. The best cure to it to take a picture of the original photo with a side lighting that isn't reflected back in the camera lens
Doubly emphasize that.
Many thanks for that, I have actually managed to improve it quite a bit with image editing, even though it took a while. I'll definitely store your suggestion away for future reference.
This is something that many people do not understand.
Every edit you make to an image removes or alters some of the original information in the image. That means that, if the image is important, it's far better to rescan the image with a different light setting than to try to "fix" it.
That is to say, if keeping the information in the image is important, it's better to re-scan it or take another photo with a different light source/setting.
On the other hand, if your intent is primarily artistic instead, you may well prefer the effects of editing.
Joel Rees

I'm imagining I'm a novelist:
http://joels-random-eikaiwa.blogspot.com/2016/11/simplife01-1-meet-the-pilots.html
- postings
- 5
Trying to remove fading from old b&w photo
Sending questions to notifications@ is not necessary. :/
About your question, I'll offer my opinion. Doubly emphasize that.
This is something that many people do not understand.Every edit you make to an image removes or alters some of the original information in the image. That means that, if the image is important, it's far better to rescan the image with a different light setting than to try to "fix" it.
That is to say, if keeping the information in the image is important, it's better to re-scan it or take another photo with a different light source/setting.
On the other hand, if your intent is primarily artistic instead, you may well prefer the effects of editing.
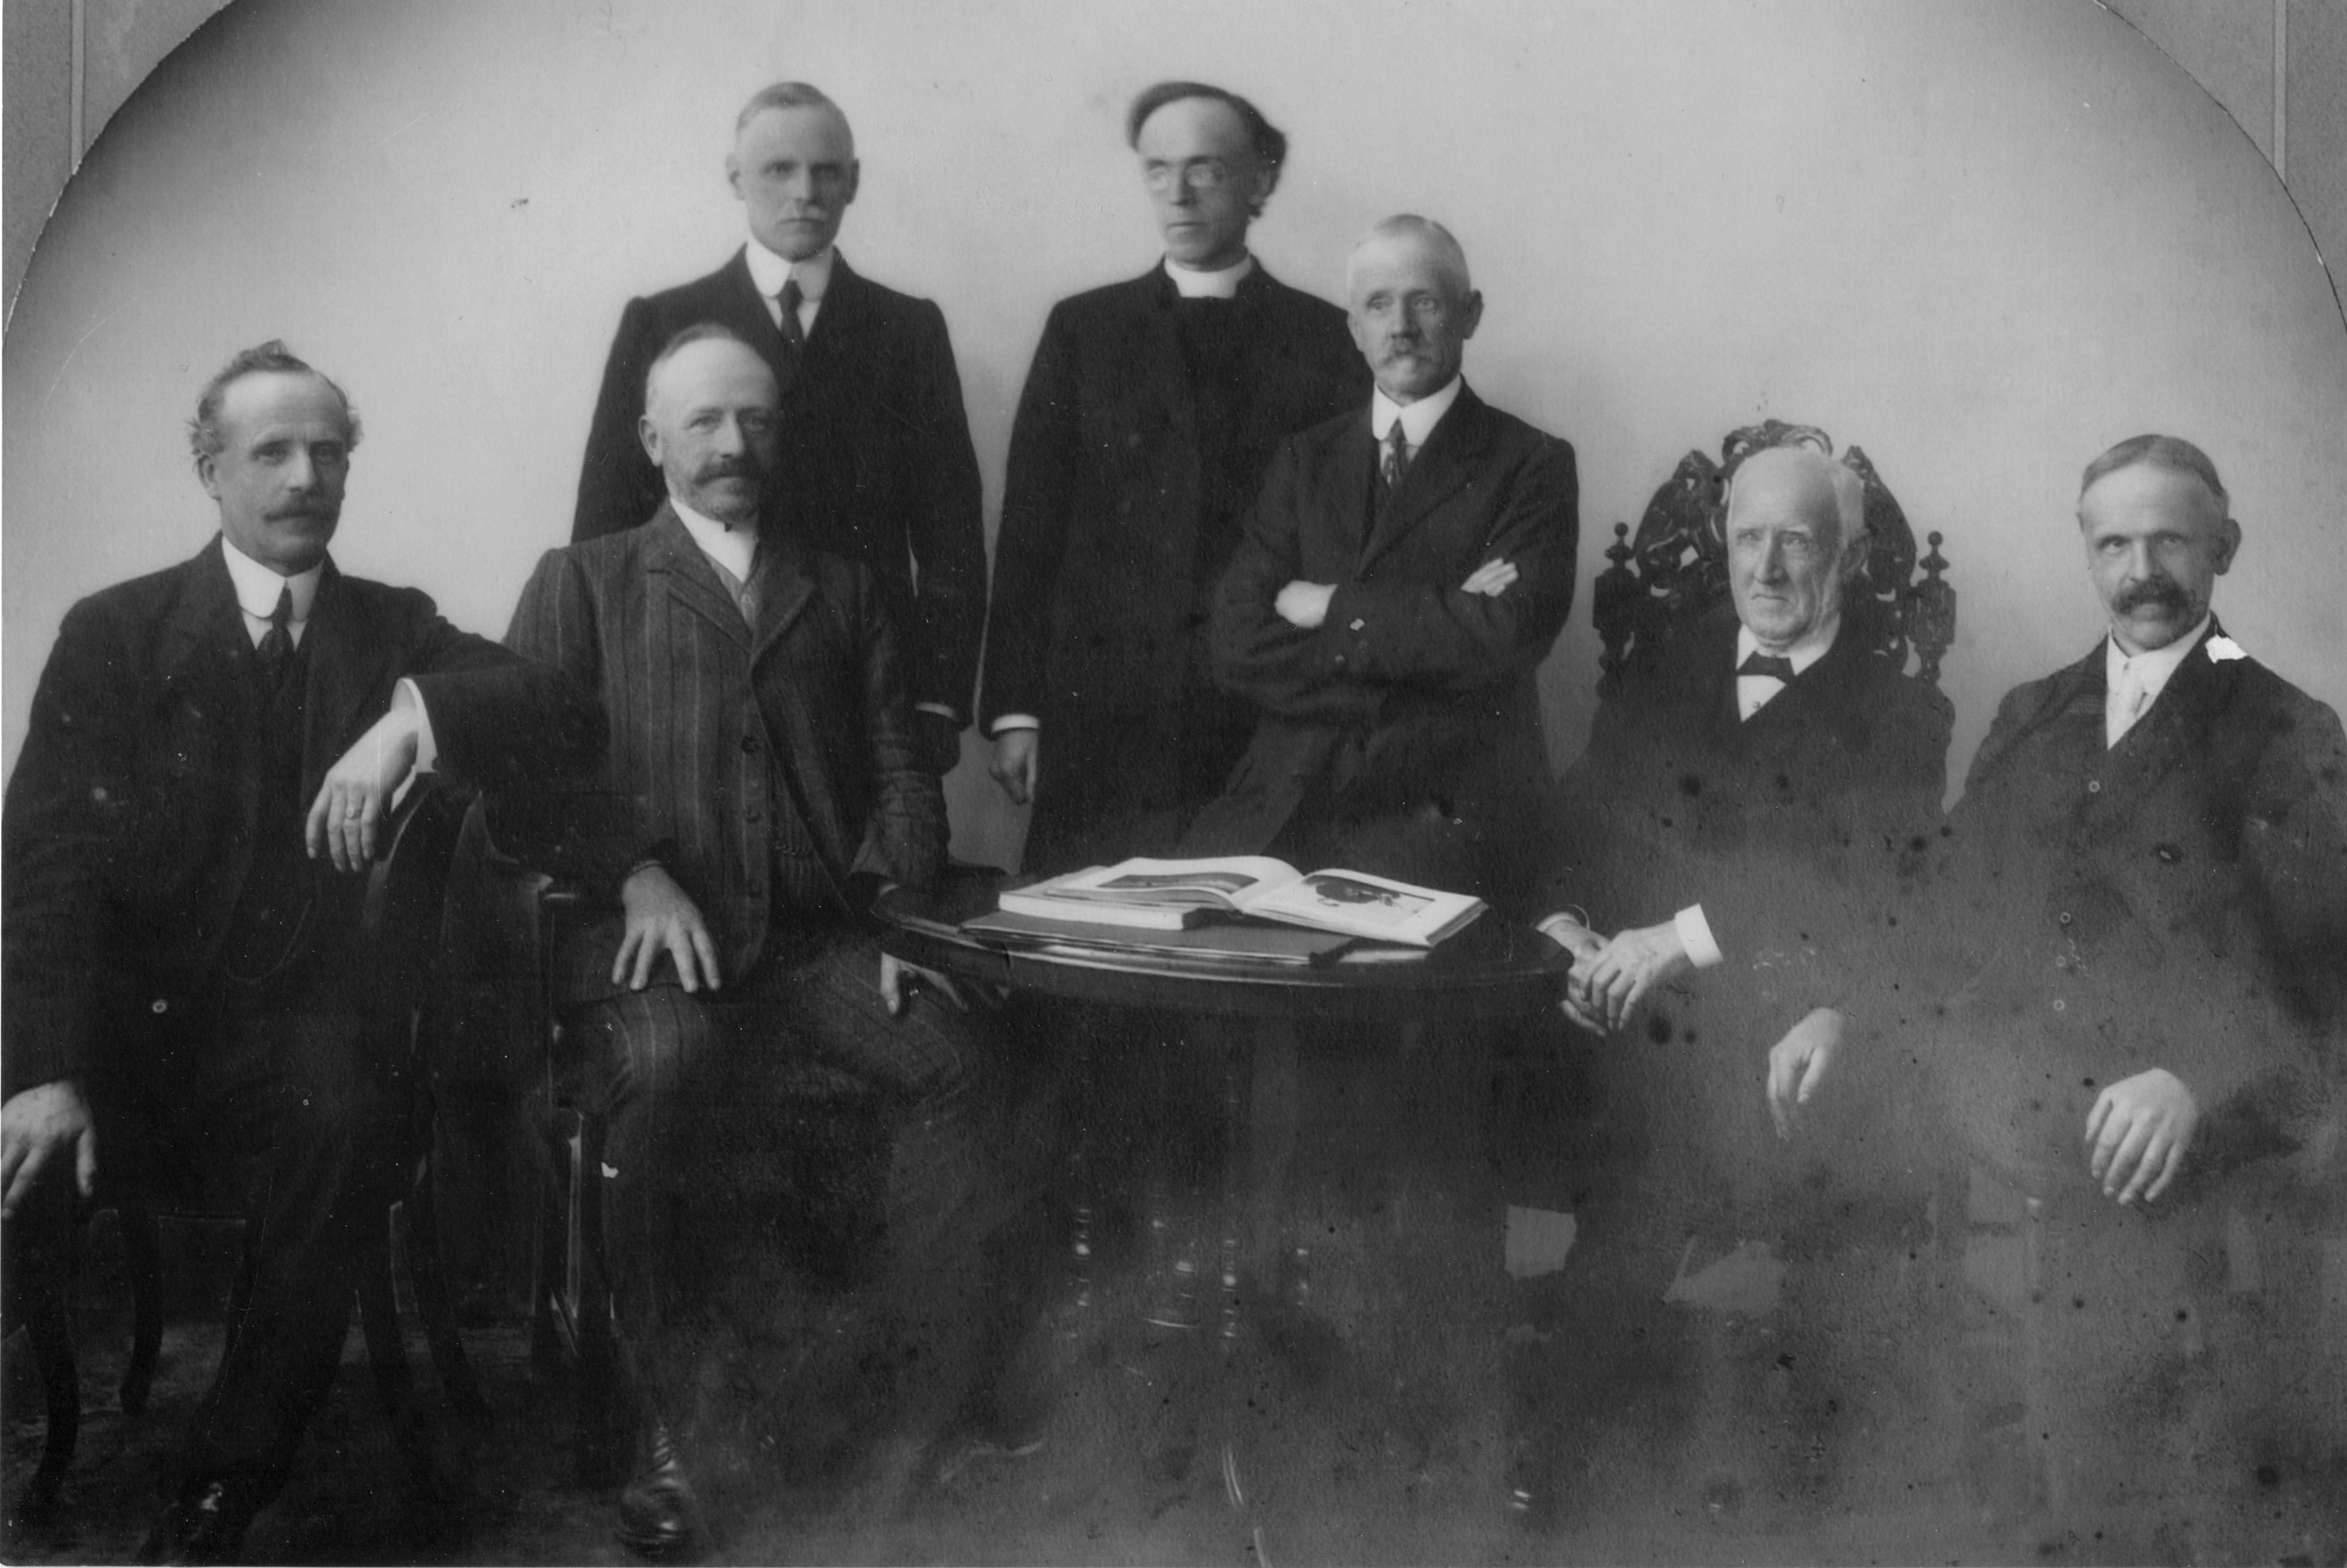
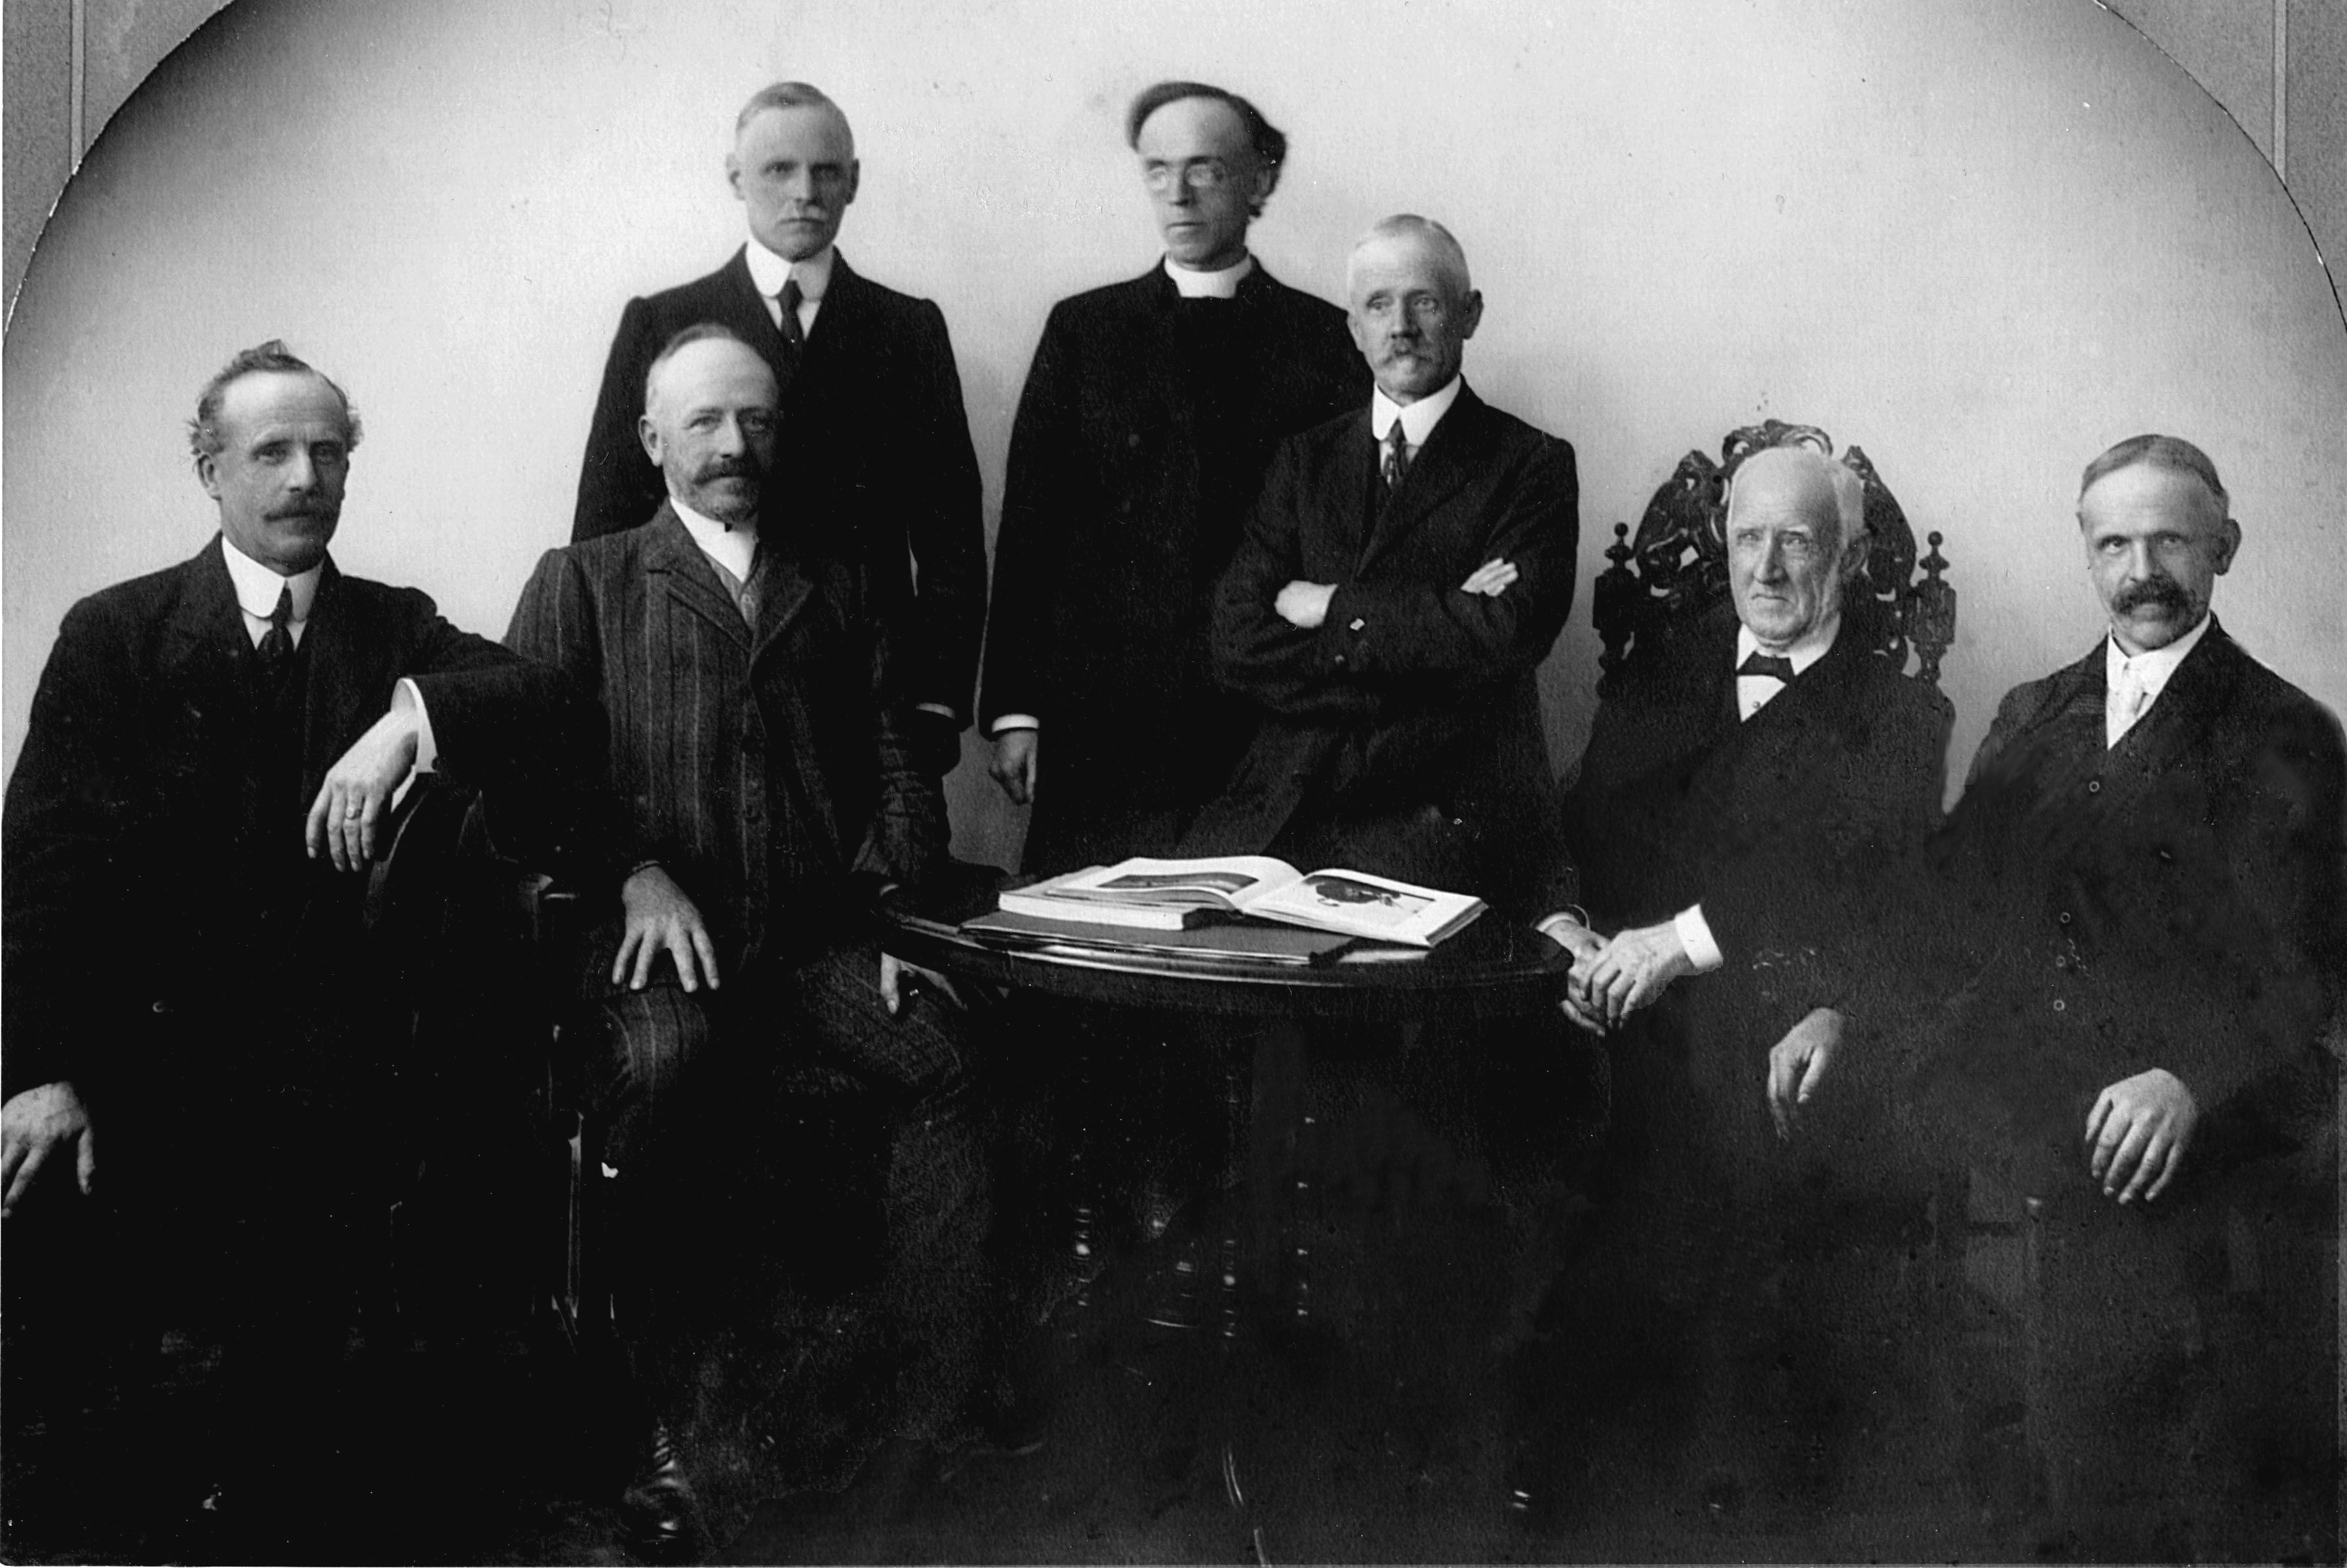
In the photo I was working on the photo was so poor in places that I couldn't actually see much detail - so not a lot to lose. My restoration attempt isn't perfect but I think looks far better. It's to be used in a family ancestry book. Before and after pics attached. (I have a basic scanner and need to learn about scanning with different light settings which I didn't actually know existed). Many thanks for your input!
-
 Family Ancestry (original)
MAY_family_400dpi.jpg (679 KB) -
 Family Ancestry (edited)
MAY_family_trial_3.jpg (869 KB)


Trying to remove fading from old b&w photo
Hmm.
On Wed, Nov 23, 2016 at 1:52 AM, Denzo wrote:
Sending questions to notifications@ is not necessary. :/
I said that, and now I go take a look at gimpusers.com, and I can't tell what notifications@gimpusers.com means. It may be an address that the gimpusers.com forum automatically adds to posts from their web UI. So, until I find out more about that, mea culpa. It was advice I shouldn't have been giving.
[...]
Every edit you make to an image removes or alters some of the original information in the image. That means that, if the image is important, it's far better to rescan the image with a different light setting than to try to "fix" it.That is to say, if keeping the information in the image is important, it's better to re-scan it or take another photo with a different light source/setting.
On the other hand, if your intent is primarily artistic instead, you may well prefer the effects of editing.
In the photo I was working on the photo was so poor in places that I couldn't actually see much detail - so not a lot to lose. My restoration attempt isn't perfect but I think looks far better. It's to be used in a family ancestry book. Before and after pics attached.
Looks like you're having fun, and you've managed to clear quite a bit of the fading. And the effective focus is improved around the face and hands. But you've lost a lot of detail in their clothing.
Looking at the man in the middle, in the back -- in the original, I can see the suit jacket. In your edited version, he is wearing something black.
That detail usually can't be brought back out with further editing. I haven't pulled your trial_3 image off the forum to check, but I'm betting that will be the case here, too.
So, unless you're rather sure that you (and your children's children?) won't be interested in the style of clothing, etc., in the future, you probably want to keep the original photo and the original scan, if you have a place to keep the photo and media for the scan.
My files are rather disorganized, but I tend to keep a lot of intermediate copies around as long as I have room for them.
Organizing files is still a problem I have not solved to my satisfaction, after forty years playing with computers. And the organization of our backups also affects whether our descendants will be able to access the information in the future, so I really should solve that problem. :-/
One suggestion I might make is to include the original scans with the book, especially if you plan to distribute the book in digital form.
I'm by no means an expert, but, so far, the only thing I have been able to find to help that kind of fading is careful and time-consuming use of various selection tools as I gradually apply the other tools I'm using to try to bring back the original colors (shades of black, in this case) -- equivalent, I think, to dark-room techniques involving graduated exposure. It looks like that may be something like what you've done.
I think that there is software in existence that semi-intelligently figures out where the fading is and semi-intelligently cleans it up with semi-success that may or may not improve on what you can do by hand for a particular case. I have not been able to find such tools in the commonly accessible tools for the gimp (or for the commercial editing software, for that matter).
If anyone has further input on that, I'm sure many of us would be interested.
(I have a basic scanner and need to learn about scanning with different light settings which I didn't actually know existed).
Unless things have changed in the last few years, a cheap scanners' settings generally don't alter the light source itself, just apply digital editing before they save the image. The editing functions that the manufacturer supplies may or may not be customized to the hardware, so they may actually be useful, or they may just be losing you information from the start.
Which is the case for your scan settings on your scanner is something you'll have to figure out. I usually just take the rawest settings I can figure out so that I can control the editing myself, particularly if I'm using a scanner that I'm not familiar with.
Professional scanners may allow you to adjust the light sources, and also provide you with custom software, some of which actually can be used to improve what the hardware gives you.
But, as I said, I am definitely not an expert with this stuff.
Many thanks for your input!
Attachments: * http://www.gimpusers.com/system/attachments/337/original/MAY_family_400dpi.jpg * http://www.gimpusers.com/system/attachments/338/original/MAY_family_trial_3.jpg
Joel Rees

I'm imagining I'm a novelist:
http://joels-random-eikaiwa.blogspot.com/2016/11/simplife01-1-meet-the-pilots.html
Trying to remove fading from old b&w photo
On Tue, 2016-11-22 at 17:52 +0100, Denzo wrote:
In the photo I was working on the photo was so poor in places that I couldn't
actually see much detail - so not a lot to lose.
There's more than you might think, especially if you can scan at 16 bits per channel (16 bit grey or 48 colour), and are using rawtherapee or darktable or the unstable 2.9 gimp.
My restoration attempt isn't
perfect but I think looks far better.
You've lost some detail in the shadows but you've done really well in the lower right. There are books about restoring old photos in PhotoShop and many of the same techniques work in GIMP too.
One technique I've used that may help is to scan the picture twice, rotating it through 90 or 100 degrees for the 2nd scan. This puts the reflected light at a different angle. Then open the first scan in gimp, and use file->open as layers to bring in the 2nd, and experiment with different layer modes or with making the top layer 50% opaque, in the Layers dockable dialogue thingy.
Liam
Liam R. E. Quin
http://www.fromoldbooks.org - words an dpictures from old books
- postings
- 5
Trying to remove fading from old b&w photo
Hmm.
I said that, and now I go take a look at gimpusers.com, and I can't tell what
notifications@gimpusers.com means. It may be an address that the gimpusers.com forum automatically adds to posts from their web UI. So, until I find out more about that, mea culpa. It was advice I shouldn't have been giving.
Looks like you're having fun, and you've managed to clear quite a bit of the fading. And the effective focus is improved around the face and hands. But you've lost a lot of detail in their clothing.Looking at the man in the middle, in the back -- in the original, I can see the suit jacket. In your edited version, he is wearing something black.
That detail usually can't be brought back out with further editing. I haven't pulled your trial_3 image off the forum to check, but I'm betting that will be the case here, too.
So, unless you're rather sure that you (and your children's children?) won't be interested in the style of clothing, etc., in the future, you probably want to keep the original photo and the original scan, if you have a place to keep the photo and media for the scan.
My files are rather disorganized, but I tend to keep a lot of intermediate copies around as long as I have room for them.
Organizing files is still a problem I have not solved to my satisfaction, after forty years playing with computers. And the organization of our backups also affects whether our descendants will be able to access the information in the future, so I really should solve that problem. :-/
One suggestion I might make is to include the original scans with the book, especially if you plan to distribute the book in digital form.
I'm by no means an expert, but, so far, the only thing I have been able to find to help that kind of fading is careful and time-consuming use of various selection tools as I gradually apply the other tools I'm using to try to bring back the original colors (shades of black, in this case) -- equivalent, I think, to dark-room techniques involving graduated exposure. It looks like that may be something like what you've done.
I think that there is software in existence that semi-intelligently figures out where the fading is and semi-intelligently cleans it up with semi-success that may or may not improve on what you can do by hand for a particular case. I have not been able to find such tools in the commonly accessible tools for the gimp (or for the commercial editing software, for that matter).
If anyone has further input on that, I'm sure many of us would be interested.
Unless things have changed in the last few years, a cheap scanners' settings generally don't alter the light source itself, just apply digital editing before they save the image. The editing functions that the manufacturer supplies may or may not be customized to the hardware, so they may actually be useful, or they may just be losing you information from the start.Which is the case for your scan settings on your scanner is something you'll have to figure out. I usually just take the rawest settings I can figure out so that I can control the editing myself, particularly if I'm using a scanner that I'm not familiar with.
Professional scanners may allow you to adjust the light sources, and also provide you with custom software, some of which actually can be used to improve what the hardware gives you.
But, as I said, I am definitely not an expert with this stuff.
Many thanks again for your thoughts Joel. You're right, I did have fun with what to me was a real challenge. The photo was for my brother-in-law who has written a family ancestry, just half a dozen copies to be given around the family. He said he's really happy with the photo, he wasn't so concerned with the picture's detail so much as generally improving the overall photo, especially the discoloration.
I should have made notes re the process I followed, but didn't! I think, similarly to what you said, I selected the very faded area and then used various tools, also under the 'Fx-Foundry' tab I used some of the enhancement options under 'Photo'. I also cloned and smudged to try and blend areas. It's a learning process every time.
I'll look into my scanner!
I have learned all my Gimping by degrees since we retired to France twelve years ago, I'm not a technical person (my hubby is but he's not into Gimp). Sometimes I don't even understand some of the terms used, but I'm constantly curious and fascinated by what Gimp can do.
Just checked your blog and I'm sure you'll become a novelist!
Thanks again
- postings
- 5
Trying to remove fading from old b&w photo
There's more than you might think, especially if you can scan at 16 bits per channel (16 bit grey or 48 colour), and are using rawtherapee or darktable or the unstable 2.9 gimp. You've lost some detail in the shadows but you've done really well in the lower right. There are books about restoring old photos in PhotoShop and many of the same techniques work in GIMP too.
One technique I've used that may help is to scan the picture twice, rotating it through 90 or 100 degrees for the 2nd scan. This puts the reflected light at a different angle. Then open the first scan in gimp,
and use file->open as layers to bring in the 2nd, and experiment with different layer modes or with making the top layer 50% opaque, in the Layers dockable dialogue thingy.Liam
Thanks Liam, I really am a complete novice at Gimping, but keen to learn more and more. I'll check Photoshop for books. I'll also experiment with your idea of scanning twice and then using layers. That sounds interesting! I think it helps if one has a 'scientific-thinking' type of mind for photography, and Gimp. The main thing is to keep learning and making notes! Many thanks again


