RSS/Atom feed Twitter
Site is read-only, email is disabled

Tutorial: Create a highlighted chrome text

Written by , translated by devvv · Created on Feb 26, 2012, last updated over 12 years ago CC BY-NC License

Motivation

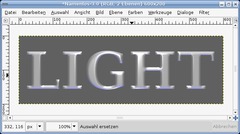
In this tutorial you will learn how you can create a nice chrome text effect with double lights (white from top and blue from bottom).

Tutorial details

  1. 1

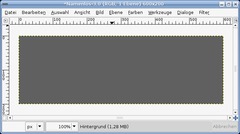
    Create a new file: 600×200px. Set a medium/dark gray as background color. I used #505050

  2. 2

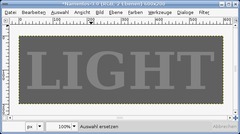
    Use the text tool and create a new text: “LIGHT”. Font size: 150 and the font color is #828282. Place the text in the middle of the canvas.

    Get rid of the text information: Layer / Layer to Image size. Don’t move the text layer from now on.

  3. 3

    In the layers dialog right click the text layer and choose “Alpha to Selection”. (GIMP 2.8 and newer: You can also do an ALT+CLickLayer to get the selection from the alpha channel).

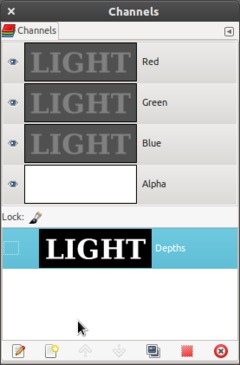
    Now switch from the layers dialog to the channels dialog. We need the channel to create the nice lightning effects afterwards using it as a bump map.

    While still having the selection active, create a new channel and call it “depths” in the popup dialog. Also activate the option “Initialise from selection”.

  4. 4

    Click the channel to make sure its active. To get better smoother highlights afterwards we need to blur the channel a little bit:

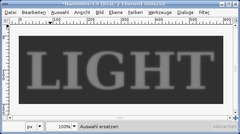
    Choose Filter / Blur / Gaussian Blur: 8px. Repeat it again with 5px, with 2px and finally 1px.

  5. 5

    Now make the channel invisible by clicking the eye symbol.

    Switch back to the layers dialog. Click the text layer to make it active. Make sure the text layer is exactly the same size as the whole image (Layer / Layer to Image size! [it should already be, because we did that in step 2 – it’s just to make sure ;)]).

    Now lets get some nice lights. Use Filter / Lights & Shadow / Lighting effects.

    Go to the “Bumpmap” tab — here the “depths” channel should appear. As max height choose 0.04.

    “Material” tab:
    Glow: 0,6
    Bright: 0,5
    Shiny: 1
    Polished: 27

    Light 1:
    Type: Directional
    Color: #ffffff (white)
    Direction: X: 0, Y: -1, Z: 0,5 (or 1)
    Intensität: 1

    Light 2:
    Typ: Directional
    Farbe: #2d1fe3
    Richtung: X: 0 Y: 1,30, Z: 0
    Intensität: 2

  6. 6

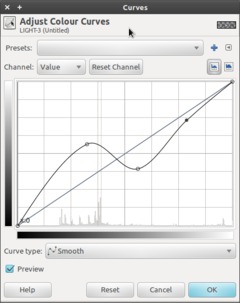
    Adjust the colors now via Colors / Curves:

  7. 7

    Finally add a soft drop shadow "Filter / Light & Shadows / Drop shadow and you’re done ;)

Comments

Post your own comments, questions or hints here. The author and other users will see your posting and can reply to it.

Of course, you can also ask in the chat.

Subscription management

Please log in to manage your subscriptions.

User rating

This topic (Create a highlighted chrome text) has been rated 4.7/5.0.

New comments are disabled because of spam.

Bob Norris
about 3 years ago

I would like to add this type of text to pictures. I have Actresses from the TV shows Regin and Game of Thrones, The text for the Show would be slight larger that the actress and character. is it hard to do?

carly rheilan
over 4 years ago

So clear. So helpful. So kind.

Rachel Designs
over 4 years ago

I am using 2.10 and it crashes when I try to do the lights & shadows.

Kacera
over 6 years ago

I use GIMP since a few years and have played around with texts. I have a few questions:

1. Do I have to use "channels" or can I just use a (invisible) copy to do the bumpmap?
2. Why do I have to blur it in 4 different steps?
3. Where does the blue-ish highlights come from?

kulkul
over 9 years ago

“Material” tab:
Glow: 0,6
Bright: 0,5
Shiny: 1
Polished: 27

Light 1:
Type: Directional
Color: #ffffff (white)
Direction: X: 0, Y: -1, Z: 0,5 (or 1)
Intensität: 1

Light 2:
Typ: Directional
Farbe: #2d1fe3
Richtung: X: 0 Y: 1,30, Z: 0
Intensität: 2
None of this is the same in GIMP 2.8 so can you update it please.

imagemturbo.com
over 11 years ago

Very good tutorial!
But I think it could have more explanatory images.
I had a bit of trouble to be able to part 5.

MichaelG7355 member for over 13 years MichaelG7355 1 comment rated this topic with 5/5
over 12 years ago

Great Article - thanx :-)

Kaii member for over 12 years Kaii 4 comments rated this topic with 5/5
over 12 years ago

thx for the tutorial ^_^

127markaz member for over 15 years 127markaz 6 comments
over 12 years ago

Thanks for quick response, Devvv. All I can say is "Nevermind". If I click on the New Channel button at the bottom of the dialogs box then I get the same that you posted.

devvv member for about 18 years devvv 1475 comments
over 12 years ago

If you don't have the option shown in my pic just fill the selection with white on the channel (it is treated as a normal layer - but you can only have black/white/gray tones on it)

127markaz member for over 15 years 127markaz 6 comments rated this topic with 4/5
over 12 years ago

This looks like a wonderful tutorial that I would like to apply to numerous sigpics. I am using v.2.6.8, however, I cannot get past Step 3 as there is no option to activate “Initialize from selection” in the channels dialog. If I right Click the 'Depths' channel I have the following options: Channel to Selection, Add to Selection, Subtract from Selection and Intersect with Selection.
What am I missing?

Thank you.

tavo
over 12 years ago

Amazing job,thanks for sharing