RSS/Atom feed Twitter
Site is read-only, email is disabled

Tutorial: [AVATAR] Become a real Na'Vi using GIMP!

Written by , translated by devvv · Created on May 16, 2010, last updated almost 14 years ago CC BY-NC License

Motivation

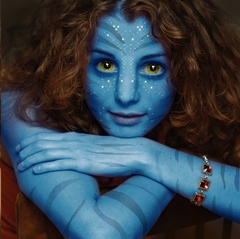
Many of you surely know the new film (by James Cameron) which already became the most successful film of all time: AVATAR! I'm a fan of the movie and so finally i had time to write a tutorial on how to make yourself into a real NA'Vi ;) Enjoy!

Tutorial details

  1. 1

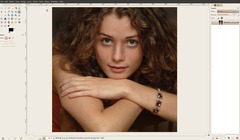
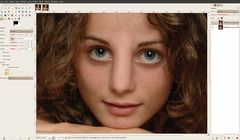
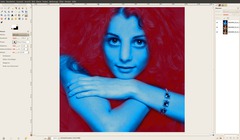
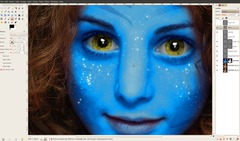
    Open up any portrait photo. If you want to use my template please download the image /w the woman above!

  2. 2

    Now duplicate the background layer and work on the copy from now on.

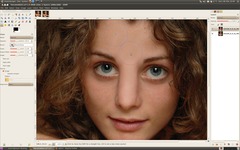
    First step is to do some face “correctures” – we’ll need bigger eyes and of course a deformed nose thats more connected with the eyes themselves (these are the typical characteristics of that blue race which is named Na’Vi).

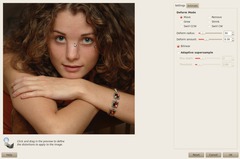
    Use the IWARP-filter (Filter / Distort / IWarp).
    Select “Move” and change the values to 30 (Radius) and a strength of 0.3. These values are used for an image that is 1000×1000px big. If you have a bigger picture increase the radius.

    Now start at the top of the nose in the middle: drag the parts of the top nose a little to the left. Work from top to bottom of the nose. Do the same for the right part and be aware not to move to much of the nose into the eyes.

    DON’T click OK yet.

  3. 3

    Maybe your eyes are a bit too much distorted, which looks not really nice I think :)

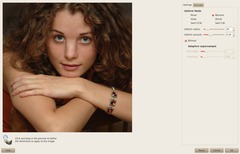
    Next use the “Remove” option in the dialogue (which should still be shown). Drag the mouse slowly over the left eye towards the nose. Be sure not to move to much to the nose – otherwise it will remove your distorted nose we just made! Do the same with the right eye

    DONT click OK yet, we still continue ;)

  4. 4

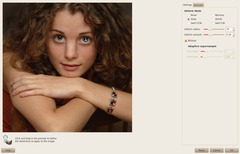
    By now the eyes should be looking normal again, we’re now going to make them a bit bigger, Select “Grow” and a radius of 70. Then move the mouse into the center of the pupilles (left and right eye) and click 3 to 4 times, each time the eye should become a little bigger.

  5. 5

    Now click OK! If your new nose is not looking fine repeat the steps 2-4.

    In the middle of the nose the skin is now looking much too deformed and does not look natural.

    Use the Clone tool, set the opacity to 50% in the tool adjustments, which will bring you more smoothness. Hold CTRL and set a cloning point at the bottom of the nose (the brighter skin there). From there we’re going to clone: now click the skin above to replace the unnatural looking skin.

  6. 6

    Now choose a starting point to clone inside the forehead and rebalance the skin tone to become a real smooth transition between nose and forehead.

  7. 7

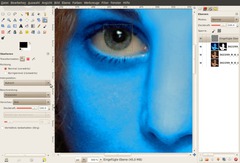
    Now we’re getting the cool blue skin in ;) Finding the right blue tone is a pain because the blue skin in the movie is allways a little different because of the different lights.

    I exported my color values from the Colors / Color balance dialogue – you can download the file (right click and “Save as…”) and import it using the dialogue (at the top, click the import-button) and just use it easily ;)

  8. 8

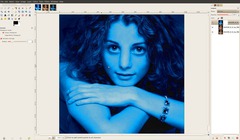
    Of course the whole picture now is colorized. But we’re working on a copy, so thats good, because we can now use a layer mask to bring the original hair color and else back in.

    As a preparation for the layer mask we’re goint to use the Quick Mask, where you can paint on a temporary layer using black and white to get a really detailed and nice selection.

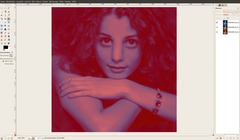
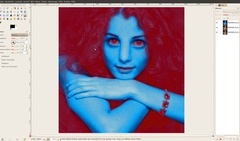
    Click the “QuickMask”-Button in the bottom left part of the image window. A red overlay is now shown. You can now paint “Black” and “White” and of source with gray tones on this layer. Black color (this is the red overlay in the beginning) represents full transparency in the selection and white represents fully selected parts after finishing the QuickMask.

  9. 9

    Now choose the paint tool and use a big smooth brush that has a radius of more or less of the size of her arm or hand. Using white color, paint all the skin pretty fast – you dont need to be too careful here.

  10. 10

    Next choose a smaller brush and carefully paint the eyes with black to make it transparent after we finish the masking.

    Tip: Use the X key on your keyboard to swiftly switch between the selected foreground and background color.

    Now paint more carefully along the skin (inside the skin use white, outside black) to refine the selection.

    - Finally take care of the part with the blurred hair on her left shoulder. Therefore set the opacity of the paint tool to app. 30% and paint over the skin that is covered with hair. This will give you a semi-transparency. Do this for the hair on the head too where the skin is shown.

    Also do this for the lips – the Na’Vi have darkred and bluish lips ;)

    Take a lot time on this step to create a very nice selection – it is important to get a authentic feeling.

  11. 11

    Now it’s going to be interesting ;) Click the QuickMask-button again – you’ll get a nice selection of it.

    Right click the layer in the layers dialogue and choose “Add Layer Mask”. Choose “Selection” in the popup dialogue and click OK. Now the below layer should shine through and only the skin will be blue.

  12. 12

    Looks pretty good so far, but the blue skin does not perfectly fit yet. You can refine this now by clicking on the mask beside the layer in the layers dialogue and there use the paint tool again to paint with white (will be shown) or black (will be transparent).

  13. 13

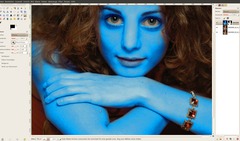
    We’re getting to the eyes now. The race on Pandora (the planet where the Na’Vi live) have big yellow/orange eyes.

    Choose the Elliptical-Selection tool and drag a selection around the iris. click Edit / Copy visible and Edit / Insert as new layer. Move the part around the eye again. The iris should be on a seperate layer now.

  14. 14

    Use the Transform-tool now and scale the iris to 125%. Use the Eraser tool to cut overlapping parts of the iris so that it fits inside the eye.

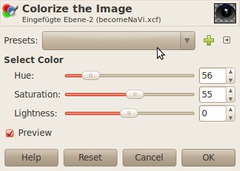
    Then use Colors / Colorize to get a yellow into it:

  15. 15

    Now do the same for the right eye. If you’re very exact you can remove the yellowish tone of the little white glare inside the eye by making a selection around it and use Colors / Desaturate.

  16. 16

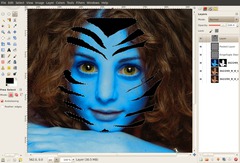
    Next we need some cool tattoos. They allways have zig-zag-like paintings on their whole body.

    Create a new layer and use the free select tool now to make that kind of painting. Hold SHIFT to add more selections at once.

    After you made the selection fill it with Black: Select Black as new Foreground-Color – then do Edit / Fill with Foreground color.

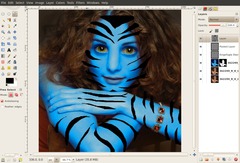
    First do the face part – just look at the image below to see how it should look:

  17. 17

    Make the same for the arms.

  18. 18

    Activate the lock-transparency button above the opacity ruler in the layers dialogue.

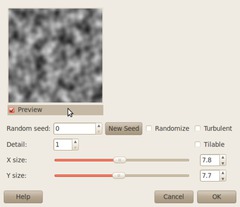
    - Filter / Redner / Clouds / Solid Noise: 0 / 15 (details) / 5.0 / 5.0

    That brings some irregularity into the tattoos.

  19. 19

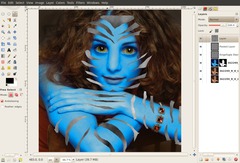
    Decativate the lock-transparency. The paintings are a bit too hard on the edges if you look close to it.

    We smoothe them now using:

    - Filter / Blur / Gaussian Blur: 10px.
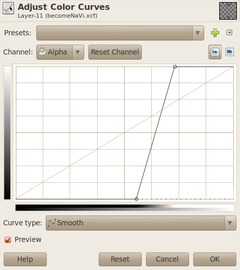
    - Colors / Curves: Move the curves together as shown below.

  20. 20

    Take the eraser-tool and delete overlapping paintings.

    Now add a layer mask, activate it by clicking it and use Filter / Render / Plastic Soise again (values below).

    then set the layers mode to overlay. You can experiment with other layer modes that darken the image if you want so.

  21. 21

    Now duplicate the layer with the tattoos / paintings again to make the effect a bit stronger if you want (this is optional).

    Finally we need some sparkle in her face.

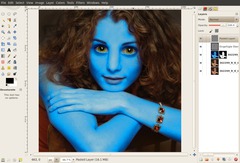
    - create a new layer: then take the Brush tool again and use the “Sparks”-brush, use a small brush scale (0.2 or so). Click often to paint single many dots under her eye, on her nose and on the forehead. If you dont like some of the sparkle you can remove it using the eraser tool.

    Set the layers mode to “Dodge”.

  22. 22

    Duplicate the sparke layer and do a Filter / Blur / Gaussian:8px.

    I hope you enjoyed the tutorial ;)

  23. 23

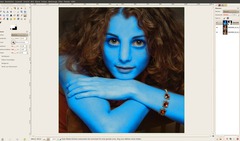
    Here is my first version – i na’vi’ized Paris Hilton – hahaha – looks imo a bit too plastic tho.

Comments

Post your own comments, questions or hints here. The author and other users will see your posting and can reply to it.

Of course, you can also ask in the chat.

Subscription management

Please log in to manage your subscriptions.

User rating

This topic ([AVATAR] Become a real Na'Vi using GIMP!) has been rated 4.7/5.0.

New comments are disabled because of spam.

maxsfcs member for over 6 years maxsfcs 2 comments
over 6 years ago

Great tutorial, I am very impress. I am facing a short problem in step no 20 I can't remove overlapping paintings. but the result is not bad. can you help me about it ? I am waiting for your help.

Sahan
about 10 years ago

Hello
I like this tutorial very much.
But im stuck in one place ....in the 7th step
Please help me.
Thanks for helpers.

Tomas
almost 11 years ago

Hey there, thanks for the tutorial. I got only one thing and that is the step 7. When i use - import your color balance the pic is different. I dont know how to have an "avatar" color. This would help me a lot. Thanks in advance. Cheers.

Mick
over 11 years ago

Excellent - I will try this :) thank you.

bell28 member for over 12 years bell28 1 comment
over 12 years ago

thanks for the tutorial. i did have a hard time copying the blue color of the skin. Color/ Color balance is such a hard way. I used Color/Components/ Channel Mixer. ^_^

it just don't clear what you did with the lips.

diego
over 12 years ago

i like to transforme this blue avatar

MockingJay9 member for almost 13 years MockingJay9 3 comments rated this topic with 5/5
almost 13 years ago

But I just have 1 more prob (bear with me) I am really having trouble with the tatoos... See for yourself!

MockingJay9 member for almost 13 years MockingJay9 3 comments rated this topic with 4/5
almost 13 years ago

Thank you! You really helped!
The tutorial went great for me!
Thanxs again!

devvv member for about 18 years devvv 1475 comments
almost 13 years ago

you can download the file under the links on top of the tutorial. just right click the file and save it. you can use andy file extension. i.e. "blue.txt". the open the color balance and import it. should work like a charm! If you have more problems just write again ;)

MockingJay9 member for almost 13 years MockingJay9 3 comments rated this topic with 4/5
almost 13 years ago

Hi! I admire yor work gretly but I am stuck on colour balance. When I tried using the examples on intro... But I can't use decimals on colour balance, so what do I do?
Can you please reply to me and tell me the colour selctions etc?
That would really help!~

Reinah20 member for over 13 years Reinah20 1 comment
over 13 years ago

Hi, i just wanna ask how u do the nose? i tried ur tutorial but it seems doesnt work on me :(

Rahul Prasad
over 13 years ago

Awesome man....... COOOOOL

skuer member for about 14 years skuer 1 comment
almost 14 years ago

Hi, Thanx for a wonder full Job.
Since I am newb with Gimp, i'd like some more detailed steps.
These can help us "new born" Navis to learn faster.

Gimp is a wonderfull tool and I love it.
Please help me and others to be GOOD.

Thanks to every one who has contributed with great tutorials.
I have tried many and it's fun to be able to create some thing and learn at the same time.

A spesial Thanx to the DEV's of this wonderfull tool!
Keep it up.

#1 AVATAR Fan
almost 14 years ago

I think the final product came out very nicely.Good job.I was just wondering..when your on the gimp users homepage..where do you go from there inorder to edit pictures the way you have just shown us? Do you need to download the user inorder to continue? I am not very good with computers and it would be very helpful to know. Thank you for taking your time to create a tutorial for everyone to follow easily. -#1 AVATAR Fan

Madi
almost 14 years ago

Hi! Im stuck on part 14!How do we do to skale the iris to 125%? I'm french and not really good at english :p Merci

fortnox007
about 14 years ago

Ears are done the same as eyes and nose. here is a pic of barack o bama :)
http://www.gimpusers.com/system/comments/8645/original-8645.jpeg

Kostas
about 14 years ago

Great tutorial, I managed to do it too thanks to you!
You missed the spot under the right armpit, it is not blue.

Rick
about 14 years ago

Great tutorial, I'll bookmark it and try it out this weekend. I hadn't heard of the IWarp plugin before, but it looks promising.

If your final product of the Paris Hilton looks plastic, maybe it's because she looked plastic to begin with?

http://photos.rickscheibner.net

devvv member for about 18 years devvv 1475 comments
about 14 years ago

rofl!!! thanks for mentioning, maybe i was thinking on something else while writing the tutorial

updated now!

Chris rated this topic with 4/5
about 14 years ago

Nice tutorial :) I believe step 21 should really read "forehead" tho

Edison rated this topic with 5/5
over 14 years ago

fantastic!, ahead!

Dallas
over 14 years ago

Im stuck on part 11 i do every thing but when i click add layer mask then selection it keeps the blue skin but makes the background checkerd with a bunch of red a gray squares

fortnox
over 14 years ago

@Bazzare, today 01:11 AM
("Im stuck on the iwarp part. The eyes keep getting dragged down with the nose and the middle part of the nose is not as flat.")

-->Try to max zoom in on the nose so your movements can be more accurate.
-->Try to decrease the amount the effect does and maybe even the radius.
-->Just start at the top of the nose(bone) in middle and drag carefully left, back to middle drag carefully right. Do this all the way down, but it takes time. And since there isn't a ctrl+Z while applying the effect, do small steps apply, and apply again.

Hope this works.
Cheers, let me know if you need further help
ciao!

Bazzare
over 14 years ago

Im stuck on the iwarp part. The eyes keep getting dragged down with the nose and the middle part of the nose is not as flat.

Johny
over 14 years ago

Just play around with it yourself
I didnt used that file anyways, much more fun to do it yourself

gimpergal rated this topic with 5/5
over 14 years ago

could someone write out the settings for the color balance import step? i imported the file, but it looks nothing like the example. :\

hope rated this topic with 4/5
over 14 years ago

im stuck on step 13!! i cant find that tool.. i have the new virson of gimp

j-sizzle rated this topic with 5/5
over 14 years ago

thanks. haha. i think paris looks better as a na'vi

fortnox member for over 14 years fortnox 4 comments
over 14 years ago

I found a new addiction
lols

fortnox member for over 14 years fortnox 4 comments
over 14 years ago

lalala

fortnox member for over 14 years fortnox 4 comments
over 14 years ago

moehaha this is so awesome
check out mister president ;-)
eye's ears and teeth ;D

Gief more of these tuts!!! :D

fortnox member for over 14 years fortnox 4 comments rated this topic with 4/5
over 14 years ago

very nice tutorial
I am still have to get used to gimp but this way i will get there =^.^=
here is my result ; ) (just a quicky)
[IMG]http://i50.tinypic.com/5nrg1s.jpg[/IMG]
link: http://nl.tinypic.com/r/5nrg1s/6

Thanks m8

devvv member for about 18 years devvv 1475 comments
over 14 years ago

color balance dows not allow decimals. why dont you try to import my exported values (download the file file above step 1 of the tutorial)

Marley
over 14 years ago

This tutorial looks really awesome, however I couldn't get past the blue skin because for some reason, my color balance won't let me do decimals? Does anyone know how to fix this? I've tried many ways, but it just won't let me get between 0 and -1. :/ Help please.

Garmahis
over 14 years ago

This tutorial is featured on 70 creative Gimp tutorials
http://garmahis.com/tutorials/gimp-tutorials/

Garmahis
over 14 years ago

This tutorial is featured on 70 creative Gimp tutorials

viktorija
over 14 years ago

nevermind, this tutorial rocks, though I didn't complete it

Viktorija
over 14 years ago

I am stuck on "Add Layer Mask", when I add and choose selection it leaves just just my skin and I don't know where to find my other things, like hair and background, please help me devvv:)

Benjamin rated this topic with 5/5
over 14 years ago

Great tutorial! Video format here:
http://www.youtube.com/watch?v=OFZsSNGXvgA
Go avatar!

Pwethior rated this topic with 5/5
over 14 years ago

Hey Devvv Have you added the ears yet?
If you have then put the page site in the comments

devvv member for about 18 years devvv 1475 comments
over 14 years ago

Hey Pwethior! Cool thing! Thanks for posting it on deviantart :)

About the ears, I will add instructions on that - thanks for mentioning. Maybe on weekend or so when I get more time :)

Pwethior rated this topic with 5/5
over 14 years ago

Hey Devv! The picture has gotten 34 views in 1day and 21hours

usr rated this topic with 5/5
over 14 years ago

I think that with this tutorial we have the better result in the network! Can anyone record a video of it, please?

Jose rated this topic with 5/5
over 14 years ago

Really nice MC-Photography!! and really cool and fun tutorial devv

Pwethior rated this topic with 5/5
over 14 years ago

Devv I added your pic to my deviantart gallery here's a link: http://guitarguy3.deviantart.com/art/Avatar-Gimp-Tutorial-165194180 drop all comments there and I'll even drop some questions on the tutorial there.

Pwethior rated this topic with 5/5
over 14 years ago

WTF??? Why does it keep adding spaces to the comments?

Pwethior rated this topic with 5/5
over 14 years ago

Devv I added your pic to my deviantart gallery here's a link: http://guitarguy3.deviantart.com/art/Avatar-Gimp-Tutorial-165194180 drop all comments there and I'll even drop some questions on the tutorial there.

Pwethior rated this topic with 5/5
over 14 years ago

Devv I added your pic to my deviantart gallery here's a link:http://guitarguy3.deviantart.com/art/Avatar-Gimp-Tutorial-165194180 drop all comments there and I'll even drop some questions on the tutorial there.

Pwethior rated this topic with 5/5
over 14 years ago

Devv why didn't you include the ears in the tutorial? I know your picture has hair covering the ears but you could've at least added the info on how to do the ears.

Pwethior rated this topic with 5/5
over 14 years ago

Then why didn't you include the ears in the tutorial devv? I know your picture has hair covering the ears but you could've at least added the info on how to do the ears.

devvv member for about 18 years devvv 1475 comments rated this topic with 5/5
over 14 years ago

you need to deform the ears in the same way as the nose using the IWarp filter!

Pwethior rated this topic with 5/5
over 14 years ago

What about the ears? You forgot the part on the ears devv

MC-Photography member for almost 15 years MC-Photography 2 comments rated this topic with 5/5
over 14 years ago

Here's mine... hope you like it. Open to suggestions and improvements.

devvv member for about 18 years devvv 1475 comments
over 14 years ago

that is the yellow brush shown in the image below :)

Camilla
over 14 years ago

I love the tutorial, and the end result looks very nice, but I don't know what you mean by the "Sparks" brush. Is it something I need to download, or am I just being clueless?

devvv member for about 18 years devvv 1475 comments
over 14 years ago

try 15 for the move-option, should work fine!

Pwethior rated this topic with 5/5
over 14 years ago

"Use the IWARP-filter (Filter / Distort / IWarp).
Select "Move" and change the values to 30 (Radius) and a strength of 0.3. These values are used for an image that is 1000x1000px big. If you have a bigger picture increase the radius." what about the radius for a 640x480px picture?

devvv member for about 18 years devvv 1475 comments rated this topic with 5/5
over 14 years ago

after you click the quickmask-icon (bottom left of the image window) again the quickMask sould turn into a selection. this selection should then be used when adding the layer mask. does this help?

Harry rated this topic with 3/5
over 14 years ago

Stuck at step 11, "Add Layer Mask"
I selected quick mask but nothing seems to happen after I right click Add layer mask and then selection

nhoriginal member for over 14 years nhoriginal 2 comments
over 14 years ago

Thanks, devvv. Apparently I was making it much harder than it needed to be! I'll have to give this another try real soon.

bio rated this topic with 5/5
over 14 years ago

Congratulations for the procedure.
One thing I have done following a video tutorial, with very similar steps.
Here's my outcome http://blog.bixbi.it/stile-navi-con-gimp

Gasilli rated this topic with 5/5
over 14 years ago

Very nice guide, every step was clear and the end result looks awesome

Aivorjhi rated this topic with 5/5
over 14 years ago

it's awesome tutorial

devvv member for about 18 years devvv 1475 comments rated this topic with 5/5
over 14 years ago

nhoriginal: you only need to save the file - the extension is not important, use .txt i.e.
then go to colors / color balance. at the top right click the small triangle and use "import" and choose the file. then the colors are loaded into the filter dialogue. see my attachment

nhoriginal member for over 14 years nhoriginal 2 comments rated this topic with 4/5
over 14 years ago

I'm running into trouble with the first part of the tutorial - the part about importing the palette. I've discovered that I need to create a file with a .gpl extension in order to import it into the palette. And I've been able to import another palette I found on the web, so the import part isn't a problem.

But what do I do with the text that appears for the navi_blau link? I've tried copying and pasting it into a new ASCII file as is, and saving it with a .gpl extension. I also tried removing the top and bottom commented sections, but no matter what I do GIMP tells me it's not a valid palette file.

Can someone help a clueless user? Thanks. And I'm using GIMP 2.6.8.

Jose
over 14 years ago

Cool tutorial devv!! and the final result is really good and convincing

sajesh rated this topic with 2/5
over 14 years ago

i lost you at step 16. my tattos dont look black as they do in yours.. :-S. they remain as selections...