RSS/Atom feed Twitter
Site is read-only, email is disabled

Tutorial: Create a cool starfield
Written by · Created on Jun 15, 2007, last updated over 10 years ago CC BY-NC License
Create a cool starfield

Motivation

This is maybe one of the oldest desktop wallpapers - nevertheless it is still a great motive! In this tutorial I'm gonna show you how you create a cool very realistic starfield with all the little details.

Tutorial details

  1. 1

    Create a new document: 1024×768 px (or any other size – just as you wish).

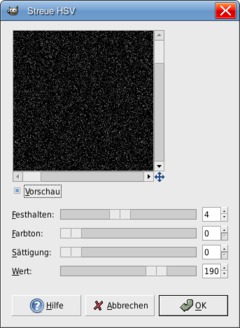
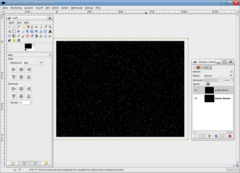
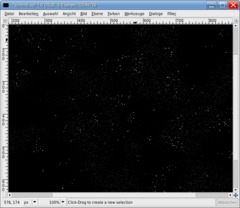
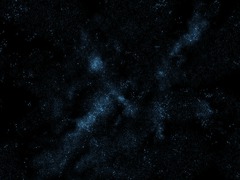
    Fill the background layer black. Go to Filter / Noise / HSV-Noise. Look at the picture and use these values

  2. 2

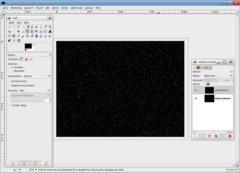
    - Colors / Brightness & Contrast -25 / +55.

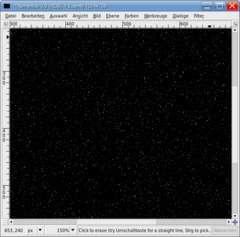
    You should get some whie dots on a black background. Name this layer “small stars” or “kleine Sterne” (as me).

  3. 3

    Duplicate the layer (the background-layer), name it “big stars” or “große Sterne” (as i did).

    Again choose Brightness & Contrast from the colors menu: -70 / +40.

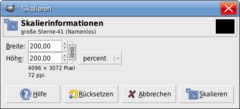
    Now we have to enlarge this layer by doubling the size. That helps us to make the small stars on this layer even bigger so that they become bigger ones. Press SHIFT+T (or use the scale tool) and enter 200% as value.

  4. 4

    We’re going to enhance these stars to make them better visible.

    - Invert the layer by Color / Invert. That is to see the stars better.
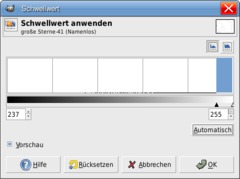
    - Colors / Threshold. Click the “automatic”-button to the right. Our dots should now be much better visible.

  5. 5

    Now invert the layer again (Colors / Invert) to see a black layer again. Scale the layer back to its almost original size. Press Shift+T and enter 53%.

    Position the layer in the middle of the image. The easiest way to do this is to use the alignment-tool (which is a new tool since GIMP 2.3.x series).

    To use the alignment-tool do the following:

    - Click the tool to activate it
    - Click the layer in the image (that should be the big stars)
    - The preferences of this tool should become active now.
    - Choose “relative to image/picture”
    - Then click both middle icons in the preferences to position your layer exactly to the middle of the screen.

    The whole thing should look like this now:

  6. 6

    In the layers-dialog choose “Screen” in the layers mode dropdown menu. Now we have a zoom or echo-effect. To avoid this we simply rotate the layer by 180°. (Shift+R to use the rotate tool: enter 180°).

  7. 7

    Save your result.

    We’re nowgetting to the point in which we give our plain starfield some live.

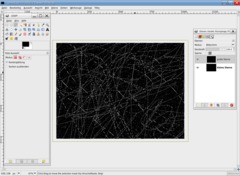
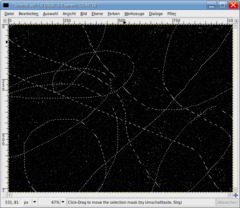
    Use the free selection tool (F) and select randomly all over the layer. This is a wild action ;) View my picture to see what i mean.

  8. 8

    Grow the selection (Selection / Grow: 8px) and after that delete the selected parts in the picture by pressing DEL (or CTRL+K if you still use GIMP 2.2).

    There should be only some big stars left in the image.

  9. 9

    Create a new layer below the “small stars” layer (“kleine sterne”). Fill this layer totally black.

    Now lets activate our small stars layer. Right click the layer in the layers dialog, choose “Add alpha channel”.

    Again use the free selection tool to select some parts of the image by random move the selection tool all over the layer, but it should be much less than the wild selection in step 7.

  10. 10

    Selection / Feather: 50px. Remove the selected area by pressing DEL. The small stars should be still crearly visible but some parts are darker or completely black.

  11. 11

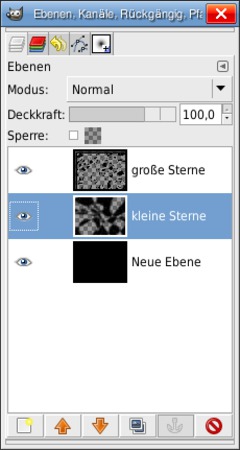
    To see what my layers look like:

  12. 12

    The next step is pretty easy: Image / Merge Image. Name this layer “Stars”.

    Now use the clone-tool, in the preferences choose “Screen” in the layers mode drop down. Now use the “Sparks”-Brush (the yellow one).

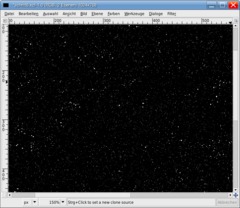
    We’re randomizing our stars now so that they look real. This step is easily done. Set a starting-point by holding down CTRL and click a part in the image. Then simply paint at any other part of the image. The area is then copied all over and added to the current position. They’re added because we use the “screen”-mode in the preferences. That means that our stars never become less – the become more all the time. If you want lesser stars in an area you need to change the mode back to “normal” and clone a region that contains only few stars.

    Lots of text ;) now just start to give your space live! and repeat the action of cloning.

    My result looks like that:

  13. 13

    Duplicate the layer. Name it “Stars glow” or “sternen glühen” as me.

    - Filter / Blur / Gaussian Blur: 15px
    - Colors / Color Balance:

    Shadows: -100 / 0 / 40
    Mids: -100 / 30 / 40
    Highlights: -100 / 30 / 40

    - Set the layers mode to “addition” or “screen”.

    Your starfield should now glow blueish. If you want to have it glow even more just duplicate the glow layer.

  14. 14

    Now some rather small steps follow to give our picture more cool details. We will make some bright glowing stars.

    Create a new layer: fill it black.
    - Filter / Light and Shadow / Supernova
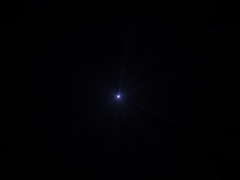
    Having the filter dialog open enter any values you like to create you shining star. But don’t make it too big for the first time and place it in the middle.

  15. 15

    Set the layers mode to “Addition” and move the layer to any position you want to have the star. Duplicate it, scale it (SHIFT+T) to a smaller or bigger size and move it to any other position.

    Repeat this until you are satisfied with the result.

    Optional: You can add some more color if you like. To do so you simply have to select the appropriate area in the “stars glow” layer with the free selection tool, feather this selection, and the apply Colors / Colorize to change the color of that area.

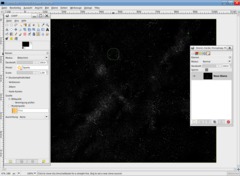
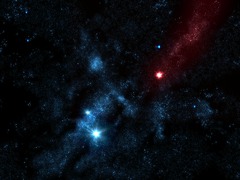
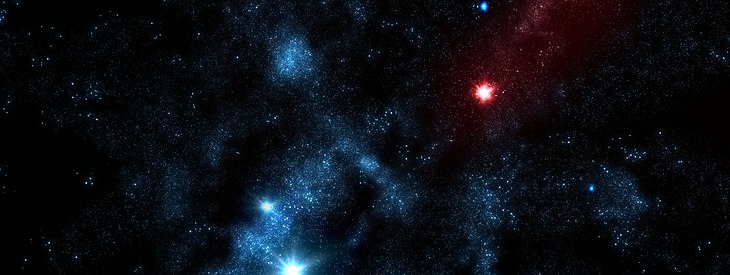
    My final starfield looks like this. Have fun creating you very own starfields ;) This can also be nicely used as a wallpaper.

Comments

Post your own comments, questions or hints here. The author and other users will see your posting and can reply to it.

Of course, you can also ask in the chat.

Subscription management

Please log in to manage your subscriptions.

User rating

This topic (Create a cool starfield) has been rated 5.0/5.0.

New comments are disabled because of spam.

DecroNecro
over 7 years ago

great tutorial! works well as long as you follow exactly and have some working knowledge alreay of GIMP

engine777 member for over 8 years engine777 5 comments rated this topic with 5/5
over 8 years ago

Thank you for the tutorial!

dragonassbabe
almost 9 years ago

im trying to get the basic small and medium stars,the beginning . im trying to do this at a 3500 pxl plus. its not working. it feels like thr filters dont match the size. getting just a box of tv fuzz .cant get the dots bigger and spaced out. how do i do this in a large pic?

Bill S.
over 10 years ago

Loved this tutorial, it's really nice. Thank you for this!

For those who can't find "Selection > Fade" --they renamed it since this was made, and I *think* it's "Selection > Feather" for now.

Kai Hartmann
almost 11 years ago

Hi,

very well done tutorial. Exactly what I needed.
Thank you very much.

For the people having trouble with step 10: Do not create the stars in step 1 in the initial background layer, instead create a new layer with transparent backround, and start from there.
The initial background layer has no transparency (I do not know why).

Kind regards
Kai

RRars
over 11 years ago

Very useful thank you :)

TroubledSoul
almost 12 years ago

I meant "step 10 can't fade out the image"
of all the times to make a mistake!
Again, if anyone can explain what I've done wrong, please tell me! Thanks in advance once again!

TroubledSoul
almost 12 years ago

Hi, I've been trying to complete your tutorial but have been having problems with it. When I get to step 10, I can fade out the image. There is no fade tool under the select(ion) menu and the fade tool under the edit menu is greyed out and does not want to work and when I delete the selection i just get a bunch of lovely white spaces. After that in step 12 when I merge my layers all I get is a star filed dotted between all the white space - can anyone tell me whats gone wrong here and how I can fix it please? This is one of the best Starfield tutorials based on GIMP and I would love to complete it! Thanks in advance!

andrew
almost 12 years ago

when I make the big bright stars, I keep having trouble with boxes around them throwing the whole area off color, how do you stop that?

Ruslan
about 12 years ago

Thank you for article! I've draw something... :)
Here is result: http://www.forum.belastro.net/files/untitled_162.jpg

Mehrdad
over 12 years ago

i did it for around 2 or 3 times, but everytime i got some problem on the step 13.
the result is different with yours

Johnny Ancich
almost 13 years ago

This was a great tutorial. I created my first star-field and used it in my cartoon:

http://pastexpiry.blogspot.ca/2012/04/star-trek-intro-i-am-huge-in-japan.html

BaiKolio
almost 13 years ago

Thank you for this great tut. It is really useful and clearly explained.
Here is one of my tries : http://imageshack.us/photo/my-images/802/spacestarsplanet.jpg/

Destructoino
over 13 years ago

You not ment to use free select, i would use the lasso tool if I were you.

I think you can delete the 'green line' by choosing another tool, but I can't remember, I haven't used that pathetic tool for a long time.

zack wall
over 13 years ago

I used your settings at the beginning, but it gave me zero stars, and the hue came out red when it worked. I'm using the newest version of GIMP, so maybe that's it? I'm not sure, but I eventually figured it out, albeit after a looooong time of tweaking settings. Thanks for the tut. though.

Gimper
almost 14 years ago

I tired this many times before I got it right very nice tutorial though!

Pinky!
almost 14 years ago

Very nice tutorial!

beanieman112
almost 14 years ago

Thanks a bunch, i didn't get the glow part, but the basic starfield looks awesome and is just what I want for a star wars lego multimedia! again, thanks heaps

hannes61 member for about 14 years hannes61 11 comments
almost 14 years ago

Looks very good.
Thank you!

gimpkid25 rated this topic with 5/5
over 14 years ago

I had figured it out before what you have to do is connect your last line to your first line so you'll get a path after that you should be able to grow and shrink the selection. Hope that helped scrubbybubbles. Heres what my first turned out as. --->http://miyofox.deviantart.com/art/First-starfield-175096574

scrubbybubbles member for over 14 years scrubbybubbles 1 comment
over 14 years ago

My Problem is the Same as Gimpkid25 's I am Stuck on step 7 Because when i use the free selection tool its a green line and wont go away... Plus when try to go to Select/grow it wont let me choose grow. Some Help would be Nice seems like it will be very cool... Thanks!

gimpkid25 rated this topic with 5/5
over 14 years ago

I relly ike this effect and everything its really cool and great for any picture, but I have a problem. I get lost at step 7 where you use the free select tool, how do you grow the selection and the free select won't go away? Mainly this is the part I'm getting stuck at. "Grow the selection (Selection / Grow: 8px) and after that delete the selected parts in the picture" Please help because I really need this effect to finish a picture I'm making.

Stinne
over 15 years ago

Thanks mate, this is just what I needed! An easy tutorial yielding awesome results!

Rahil
over 15 years ago

Hi,

I loved your tutorial and it's like a charm! I could create beautiful starfield at http://xdesigning.wordpress.com/2009/09/03/galaxy/

Thanks, thanks a ton! :)

teddbear55
over 15 years ago

Great tutorial!! Very easy to follow and the result is beautiful!!
Thanks!

Dur'Rean
over 15 years ago

nice tutorial!

this is my 5th try
http://picload.org/image/12431e231e5b75e81c41b8e8edbf14f1/space5.jpg

Evan
over 15 years ago

I have 2.6 and it worked great for me :)i added a planet that i learned to make in a different tutorial and it's my desktop now :)

http://i238.photobucket.com/albums/ff72/skinnyforlife92/Universe.png

qaz32152
over 15 years ago

im using 2.6 and couldnt find some some of the steps. Also, mine looks nothing like the star field and i followed the steps i could do. i got up to the sparks just fine, after that it went down hill.

Miripi
over 15 years ago

Thanks for the tutorial!

It's my first starfield and I think it isn't very bad...

[url=http://www.freeimagehosting.net/][img]http://www.freeimagehosting.net/uploads/b7728e607c.jpg[/img][/url]

See next tutorial! (^_^)

devvv member for over 18 years devvv 1475 comments
over 15 years ago

in the layers dialog above the opacity ruler is a dropdown field for the layer modes - in this you'll find the "screen" option. nothing of the workflow changed for 2.6

Aramaxus
over 15 years ago

I am using 2.6 and cannot find the "screen" option. I have tried a few tutorials and gimp 2.6 is different in every one. So frustrating.

devvv member for over 18 years devvv 1475 comments
almost 16 years ago

Run, maybe you would be happier with the german version of the tutorial -> see at top "available in other language". There is a translation of it ;)

Run
almost 16 years ago

apart from my little problem:
great turtorial, thak you very much for putting so much efford in explaining it all :)

Run
almost 16 years ago

hmmm...its kinda strange
in step 12 i choose the 'screen'-mode (or 'bildschirm' since i use the german version of gimp), but my stars just wont become more :(( the picked area is copied, but thats all...
i dnt know if i did anything wrong, but i dont think so. well, i'll work on that problem

Igor
almost 16 years ago

hey man i'm using gimp 2.6 and I can't find "colors / threshold"
please help me

baz
almost 16 years ago

FANTASTIC! many thanks.

shiggityshaggs
almost 16 years ago

Been making starfields all night ;) Thanks!

Thomas
almost 16 years ago

very helpfull indeed - thanks

Kristian
almost 16 years ago

Awesome tutorial, thanks!

Thor
about 16 years ago

Thank you I had the same problem with the fade. Fade is only used (under edit)when you only use fill or blend.

devvv member for over 18 years devvv 1475 comments
about 16 years ago

you can fade selections by using Selection / Feather

Corinne
about 16 years ago

i can't find the fade.

peileppe
over 16 years ago

very nice tutorial as usual - made my own version here > http://openclipart.org/media/files/Peileppe/9789

Noddy member for over 16 years Noddy 1 comment
over 16 years ago

This is the amazing. keep up the good work, i mad one and added other things to it.

Cr1mS0n member for over 16 years Cr1mS0n 1 comment
over 16 years ago

Nice Tutorial. thx. made one but it didn't came up as good as i wanted XD

band_geek_06 member for over 16 years band_geek_06 1 comment
over 16 years ago

this is awesome, i just made one.

http://www.flickr.com/photos/22476702@N02/2614041063/sizes/o/

thanks for the great tutorial!

Sophia
over 16 years ago

Very nice, thanks!

amy
over 16 years ago

ignore that, i did it :)
thankyou! great tutorial

amy
over 16 years ago

i couldn't enlarge the layer by 200% cos when i went to scale layer it just had the pixels option

Daniel
almost 17 years ago

Really nice tutorial... I am going to use the image I made as a background for a game. Thanks.

Pixkid member for about 17 years Pixkid 4 comments
almost 17 years ago

Wow... extremely realistic and visually appealing. Well put together.

John
almost 17 years ago

Amazing. I made my own and set it as my desktop. Thank you!

gimpqueen
almost 17 years ago

Omg! That's a REALLY COOL tutorial!

Miroslav Karpis
about 17 years ago

many many thanks. Excelent

Slion
about 17 years ago

Fantastic! Thanks a lot for publishing that article.

I could not get the part with Color / Colorize to work on my GIMP 2.4.2 in order to change the star glow color. That's no problem though, once you got the general method you can easily come up with variations to get the desired effect.

gimpy
about 17 years ago

great!

coche
about 17 years ago

Thanks for the tutorial. Indeed very cool starfield!